THE DECOR SOUNDS MANUAL
Make yourself
heard.
A practical guide to the add-on, desktop Studio and cloud houses. Start with your first background, or jump to the step you need.
Your guide to Decor Sounds and Studio 0.7.5.
No matching chapters. Try “zones”, “publish” or “backup”.
CHAPTER 01
Understand the three parts
Decor Sounds is the add-on you use inside WoW. Desktop Studio manages the audio files on your computer. This website shares cloud builds and manages your account.
| Part | What you do there | What it stores |
|---|---|---|
| WoW add-on | Assign backgrounds, place zones, save and load builds. | Assignments and builds in WoW saved settings. |
| Desktop Studio | Import and edit audio, read saved WoW builds, publish or install houses. | Your local sound library, source records and app settings. |
| Cloud website | Browse houses, create an account, connect Studio, change visibility and delete cloud builds. | House settings and supported CC0 source references from Freesound and OpenGameArt. No audio files. |
The add-on does not connect to the internet or download audio. A visitor needs the add-on, the shared settings and the matching sounds installed locally.
Back to contents ↑CHAPTER 02
Your first soundscape
- Install the add-on. Put the DecorSounds folder in your WoW client’s Interface/AddOns folder. Enable it at character selection.
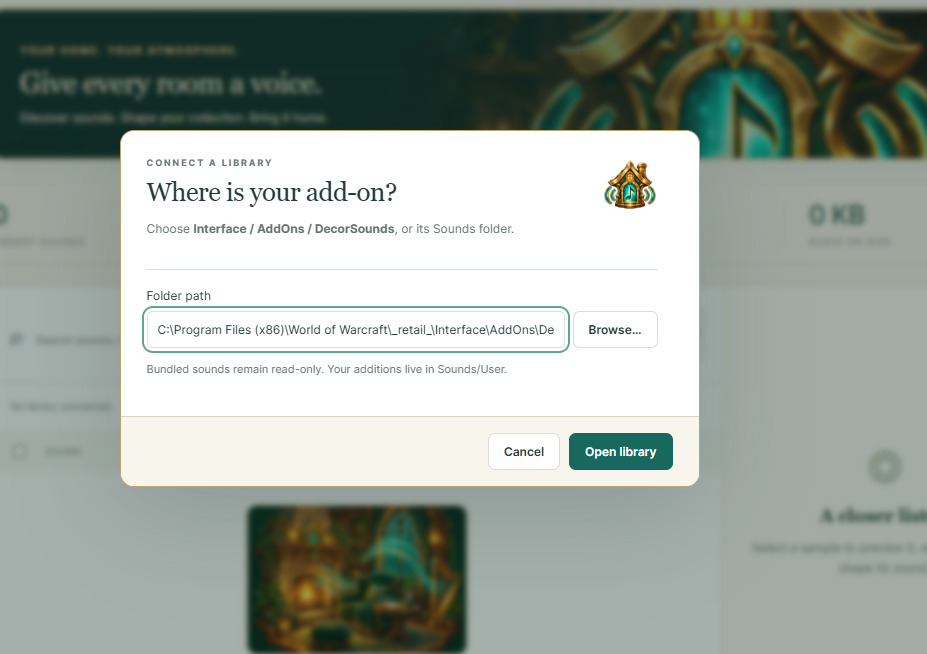
- Open desktop Studio. Choose Open library, then select that same DecorSounds folder.
- Choose a sound. Start with a bundled sound for local use, or discover more through Studio’s Find sounds · Freesound and Explore · OpenGameArt tools. Supported CC0 imports can also be shared in cloud houses.
- Enter your house in WoW. Type
/dsounds. In Library, select a sound, then open Rooms & backgrounds and apply it. - Add a zone. Stand beside the fireplace or other decor, open Sound zones, create a zone, choose a radius and save.
- Save your work. In Builds, enter a name and use Save as new build. After later edits, use Update selected.
Want visitors to hear it too? Continue with Import from WoW and Publish a cloud house.
Back to contents ↑CHAPTER 03
Install & connect
Install Decor Sounds in WoW
Use the client folder you actually play from—for example World of Warcraft/_retail_/Interface/AddOns/DecorSounds. The DecorSounds.toc file should be directly inside DecorSounds, not inside a second nested DecorSounds folder.
Restart the game after the first install and enable Decor Sounds in the AddOns list. Type /dsounds after entering the world.
Install desktop Studio on Windows
When a Windows Setup EXE is provided, run it and follow the installer. Open Decor Sounds Studio from its shortcut.
In Studio, select Open library → Browse and choose the add-on’s DecorSounds folder (its Sounds folder is also accepted). If you have several WoW installations, check that Studio and the game use the same one.
Set up audio conversion
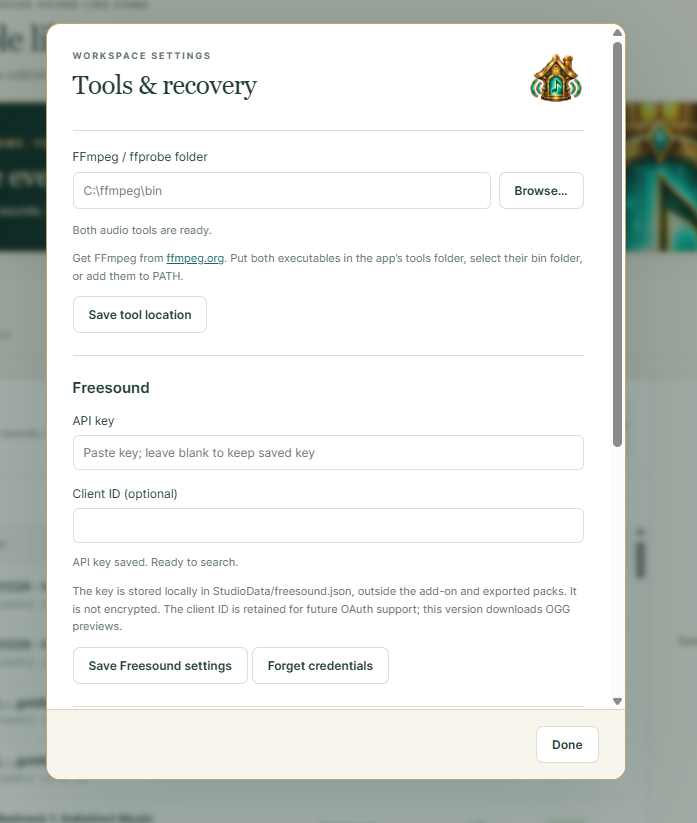
Conversions need FFmpeg and ffprobe. In Settings & backups, choose the folder containing both executables and click Save tool location. The app reports whether they are available.
Visit Downloads for release availability and links to the audio tools. If a desktop window will not open, check that the Microsoft Edge WebView2 Runtime is installed.
Back to contents ↑CHAPTER 04
House & room backgrounds
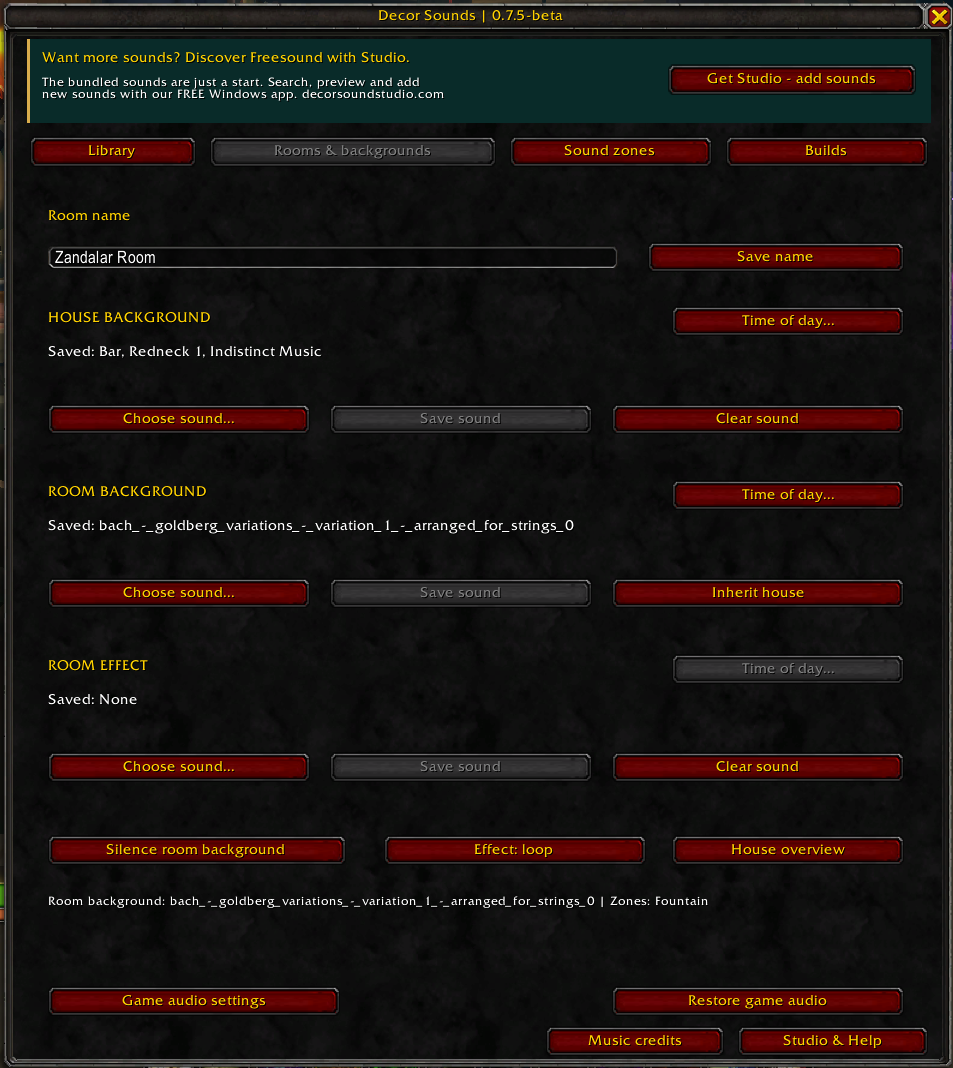
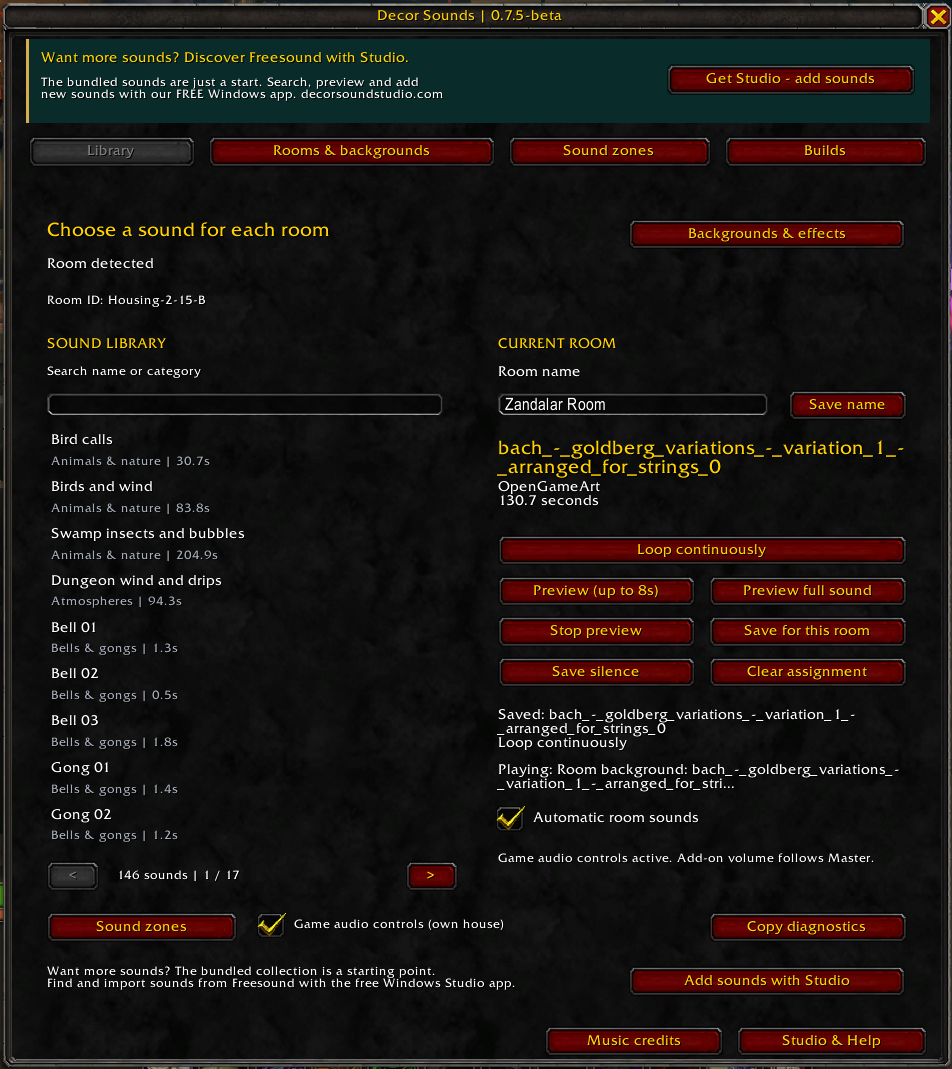
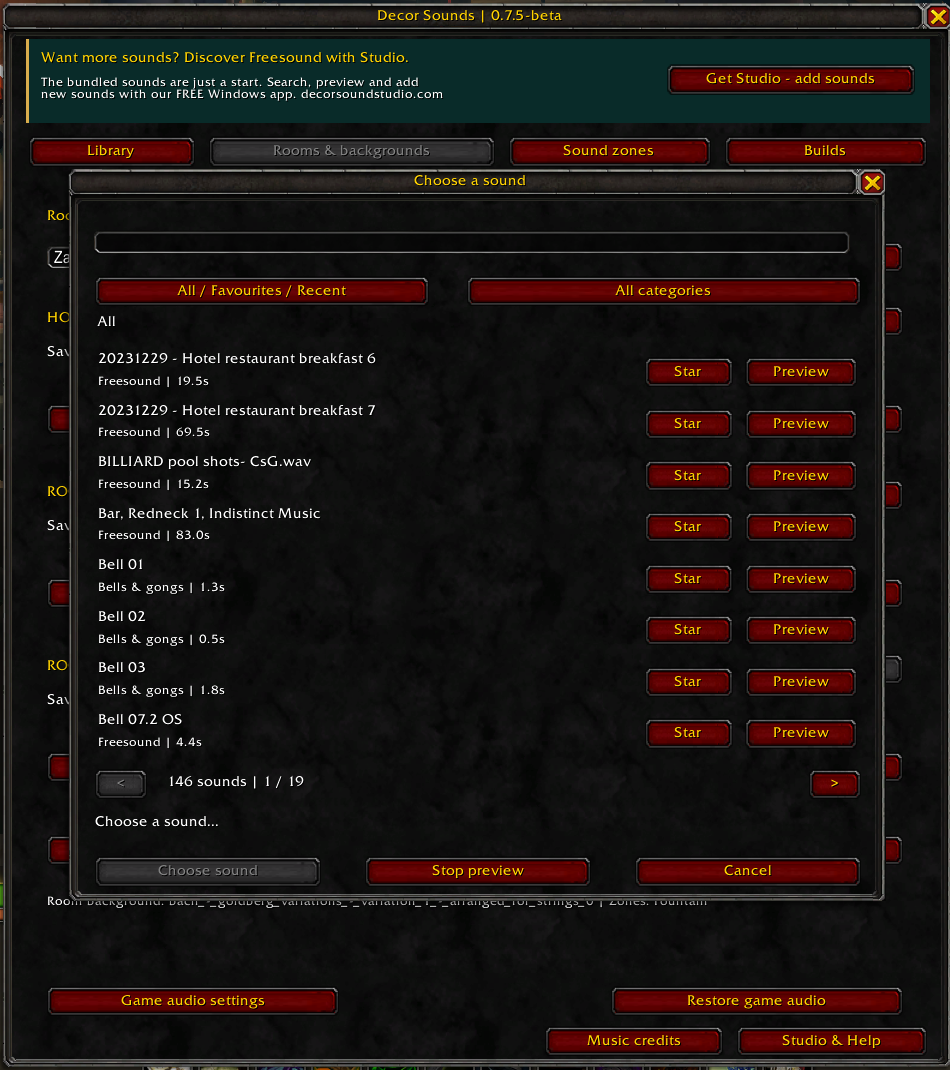
Open /dsounds, select a sound in Library, then move to Rooms & backgrounds while standing in the room you want to configure.
| Control | Result |
|---|---|
| House background → Use selected sound | Sets the default loop for this house. |
| Room background → Use selected (loop) | Overrides the house loop in the current room. |
| Silence background | Makes the current room’s background silent. |
| Inherit house | Returns this room to the house background. |
| Room effect → Selected: once on entry | Plays an additional effect when you enter. |
| Room effect → Selected: loop | Loops an additional effect over the background. |
| Clear effect | Removes the room’s extra effect. |
A room background replaces the house background there. Use a room effect when you want a separate sound playing alongside it.
CHAPTER 05
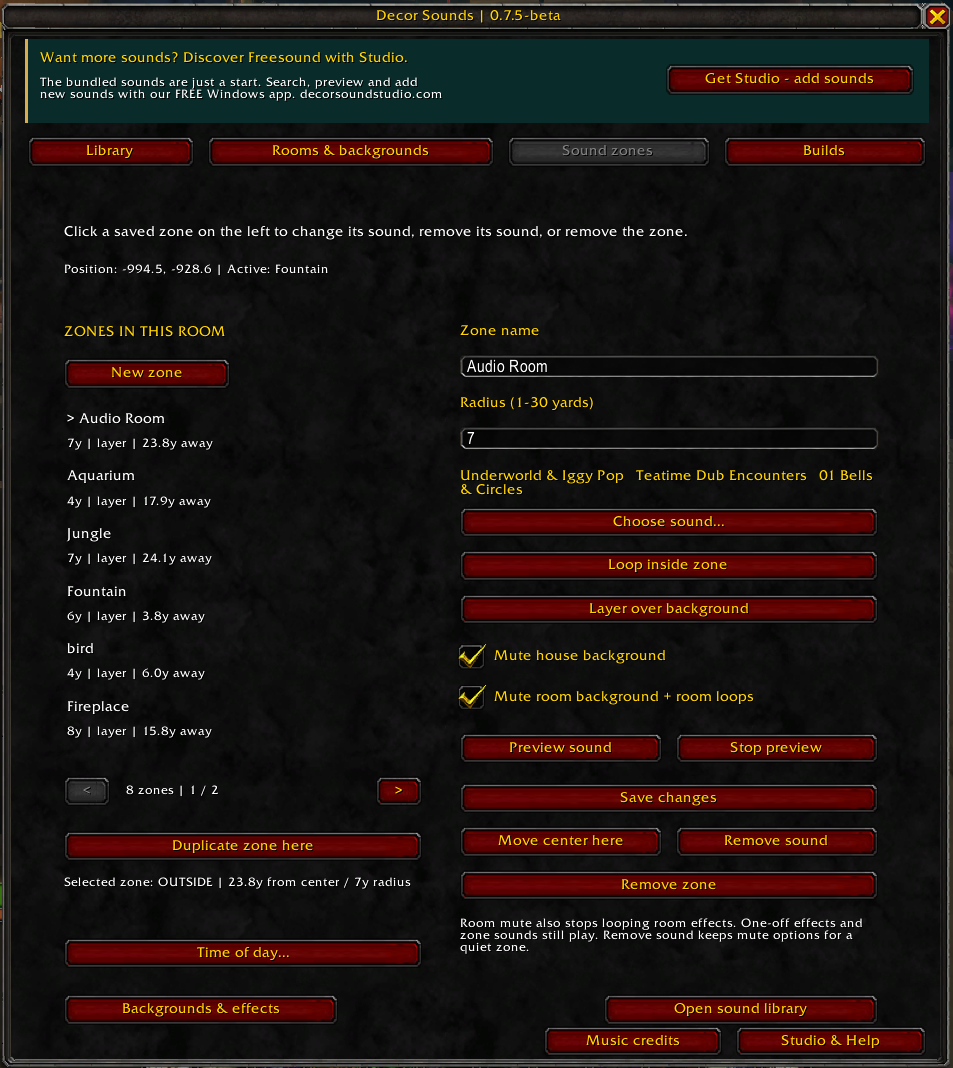
Create & edit sound zones
- Stand at the centre of the area in the correct room.
- Select a sound in Library and open Sound zones.
- Choose New zone, enter a useful name and set a radius from 1 to 30 yards.
- Use Use selected library sound. Choose loop or once on entry, then layer or replace behaviour.
- Save the zone. Walk out and back in to check its reach and playback.
Choose how the zone behaves
Layer adds the zone sound over the background. Replace uses the zone sound in place of the background. Loop repeats while you remain inside; once on entry is useful for a bell or a brief effect.
Mute house background suppresses the house loop. Mute room background + room loops also stops looping room effects; one-off room effects and zone sounds remain separate.
Edit a saved zone
Select it in the left list. Change its settings and click Save changes. Move center here moves it to your current position. Remove sound keeps the area and mute settings, which is useful for a quiet spot. Remove zone deletes the zone itself.
CHAPTER 06
Save, load & recover builds
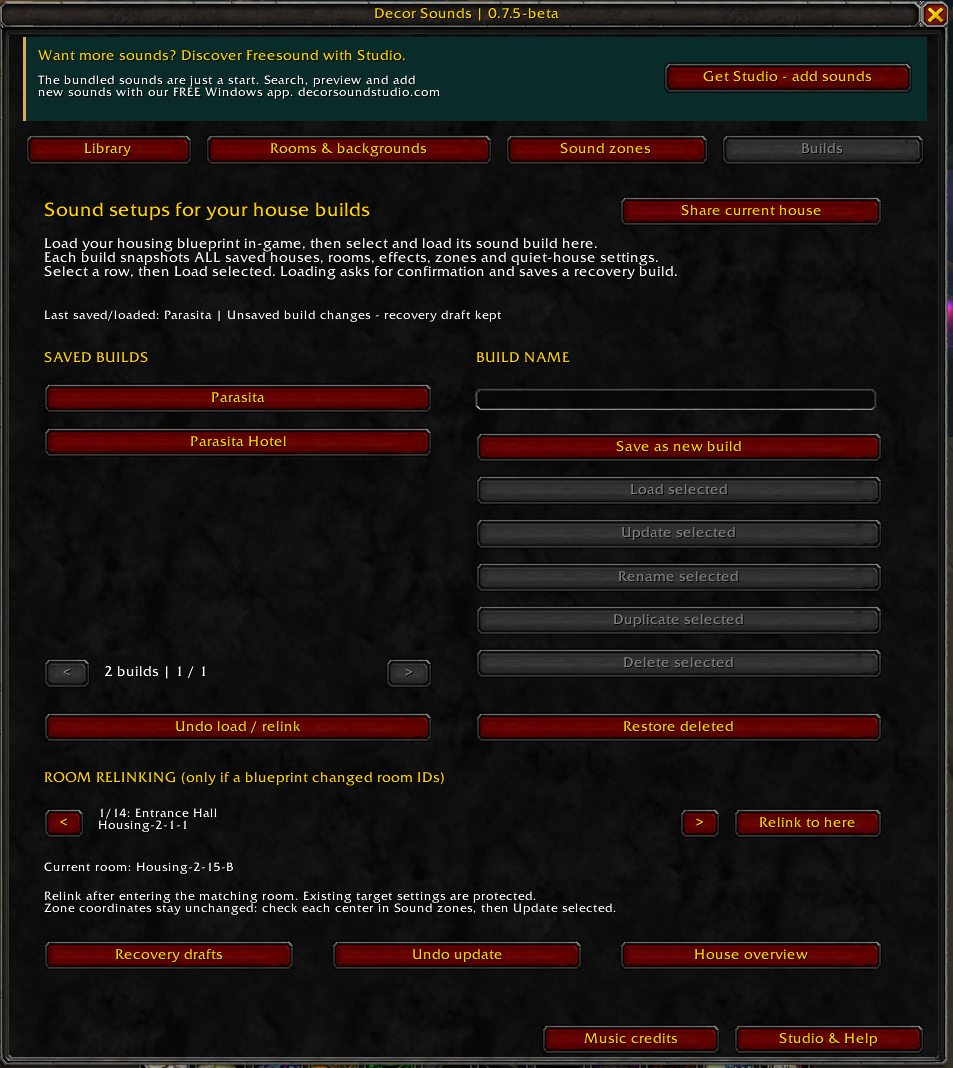
Open Builds or type /dsounds builds. A build snapshots all your saved houses, rooms, effects, zones and quiet-house settings. It is broader than a one-house export.
- Save as new build: enter a name and save a separate snapshot.
- Update selected: replace the selected snapshot with your current assignments; confirm when prompted.
- Load selected: select a row, then load it explicitly. In the updated add-on, a confirmation offers Save recovery & load, preserving the current work before replacement.
- Rename / Duplicate: organise snapshots without needing to rebuild them.
- Delete selected / Restore deleted: remove a saved entry or restore the most recently deleted entry while available.
- Undo load / relink: recover the previous setup after a load or relink while that undo snapshot is available.
When a housing blueprint changes room IDs
Load the intended housing blueprint in game first. If old room assignments no longer match, enter the matching room and use Relink to here for the old room listed in the relinking area. Existing target settings are protected. Zone coordinates stay unchanged: check each centre and move it if necessary, then update your named build.
CHAPTER 07
Your desktop sound library
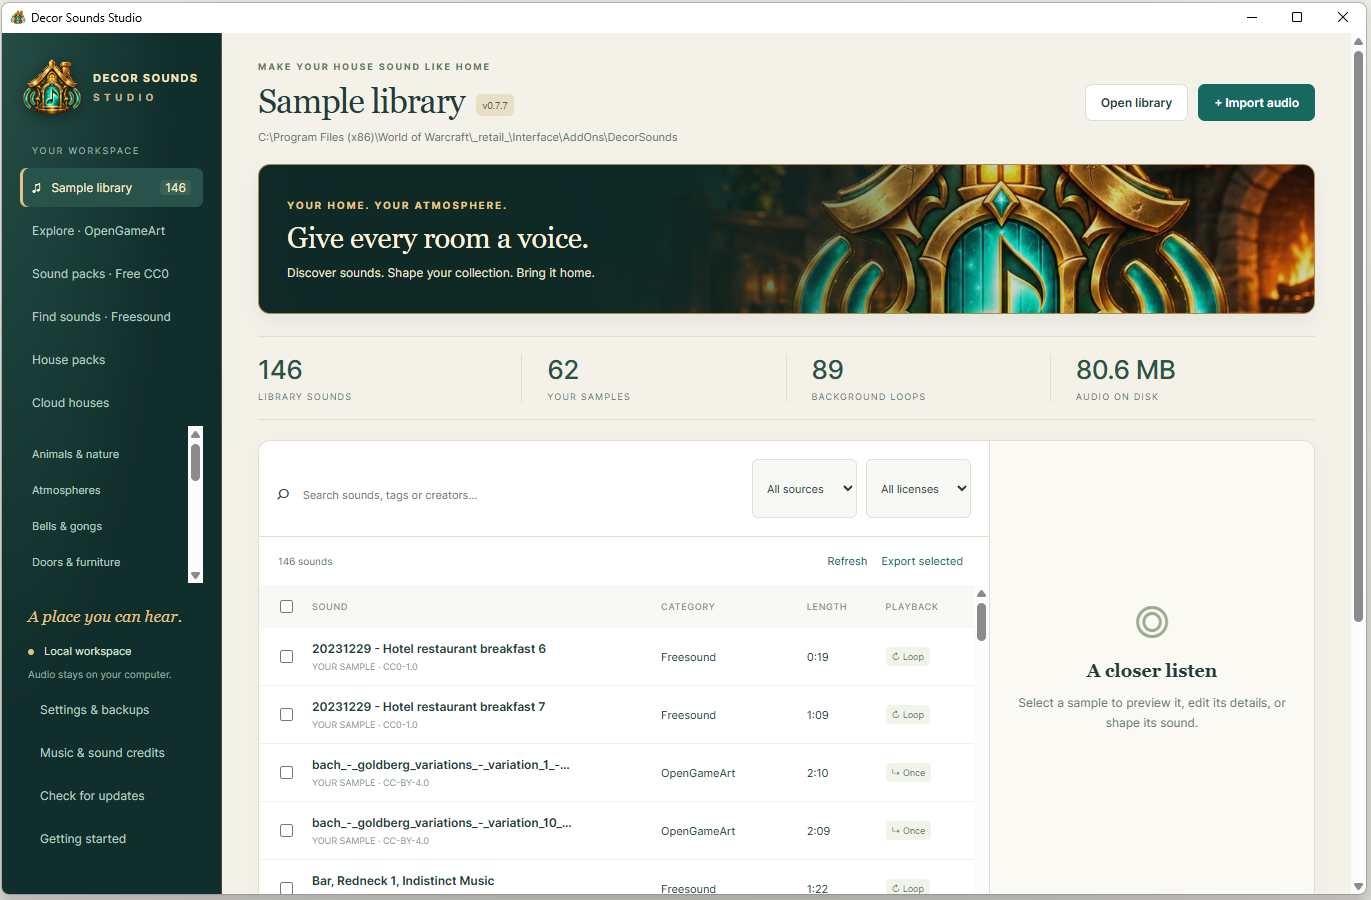
Studio 0.7.4 brings the Decor Sounds emblem, tavern artwork and warm gold-and-teal colours to your desktop. Your sound library, imports and sharing tools remain in their familiar places. This visual update keeps your existing sounds and settings.
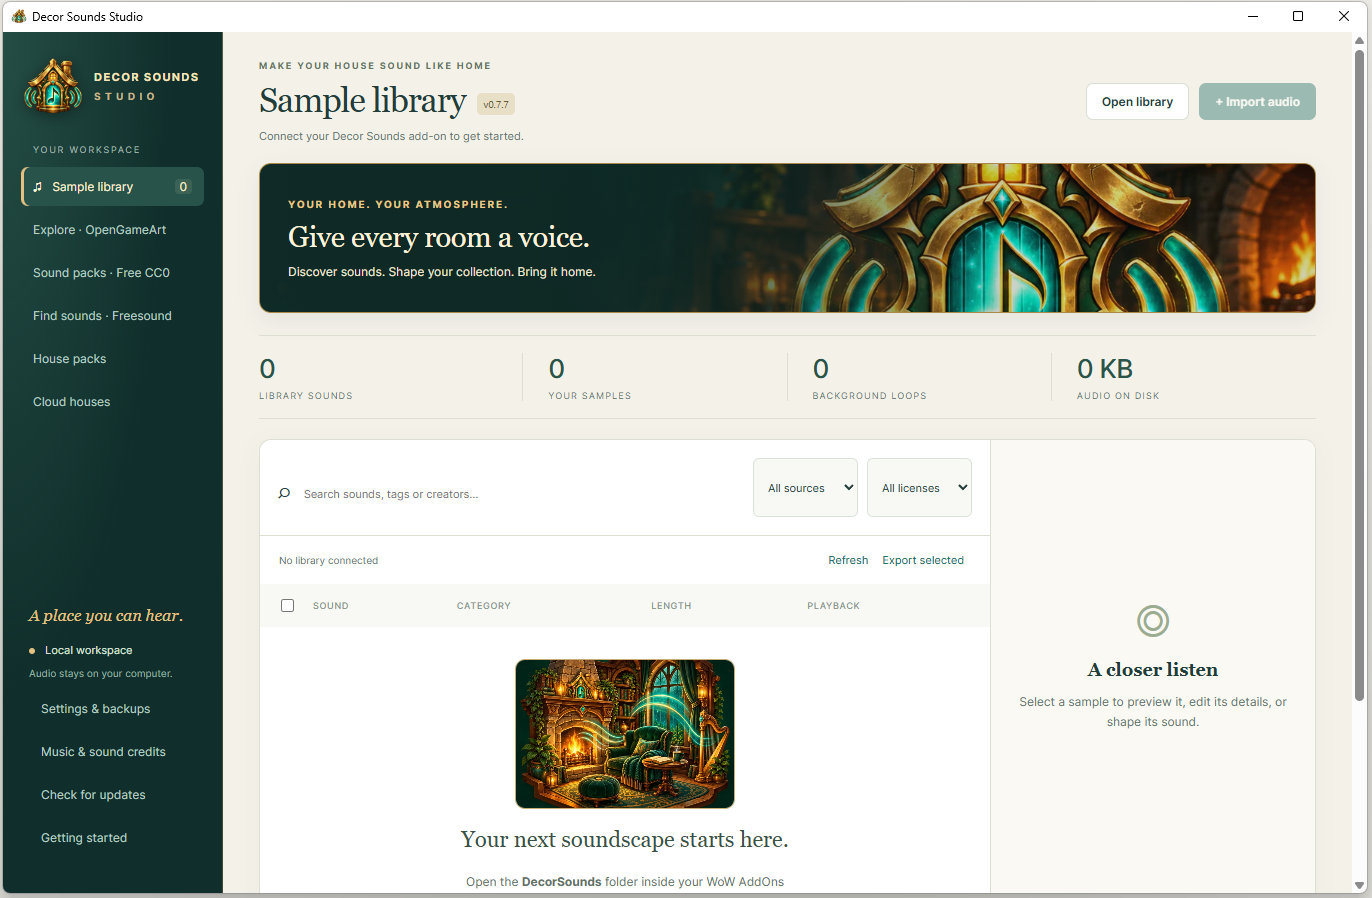
Studio reads the library in the add-on folder you selected. Use search, categories and source/licence filters to find a sound. Select a row to preview it and inspect or edit its details.
Import your own audio
Use Import audio or drop supported recordings into the library. Set the category, default playback, creator, source and licence record. Expand conversion options to adjust the sound before Convert & add.
Studio keeps originals for later edits. You can trim recordings, adjust gain or normalisation, add fades and choose conversion settings. Listen after editing and check the join before using a sound as a loop. Bundled sounds are read-only.
Keep the add-on in sync
Custom sounds live under Sounds/User. If files are present but missing in the add-on list, use Repair add-on registration, then try /reload in WoW. Restart WoW if newly added audio still will not play.
The desktop window’s close button exits the app. Use its explicit tray option when you want Studio to keep running in the background.
CHAPTER 08
Find Freesound sounds
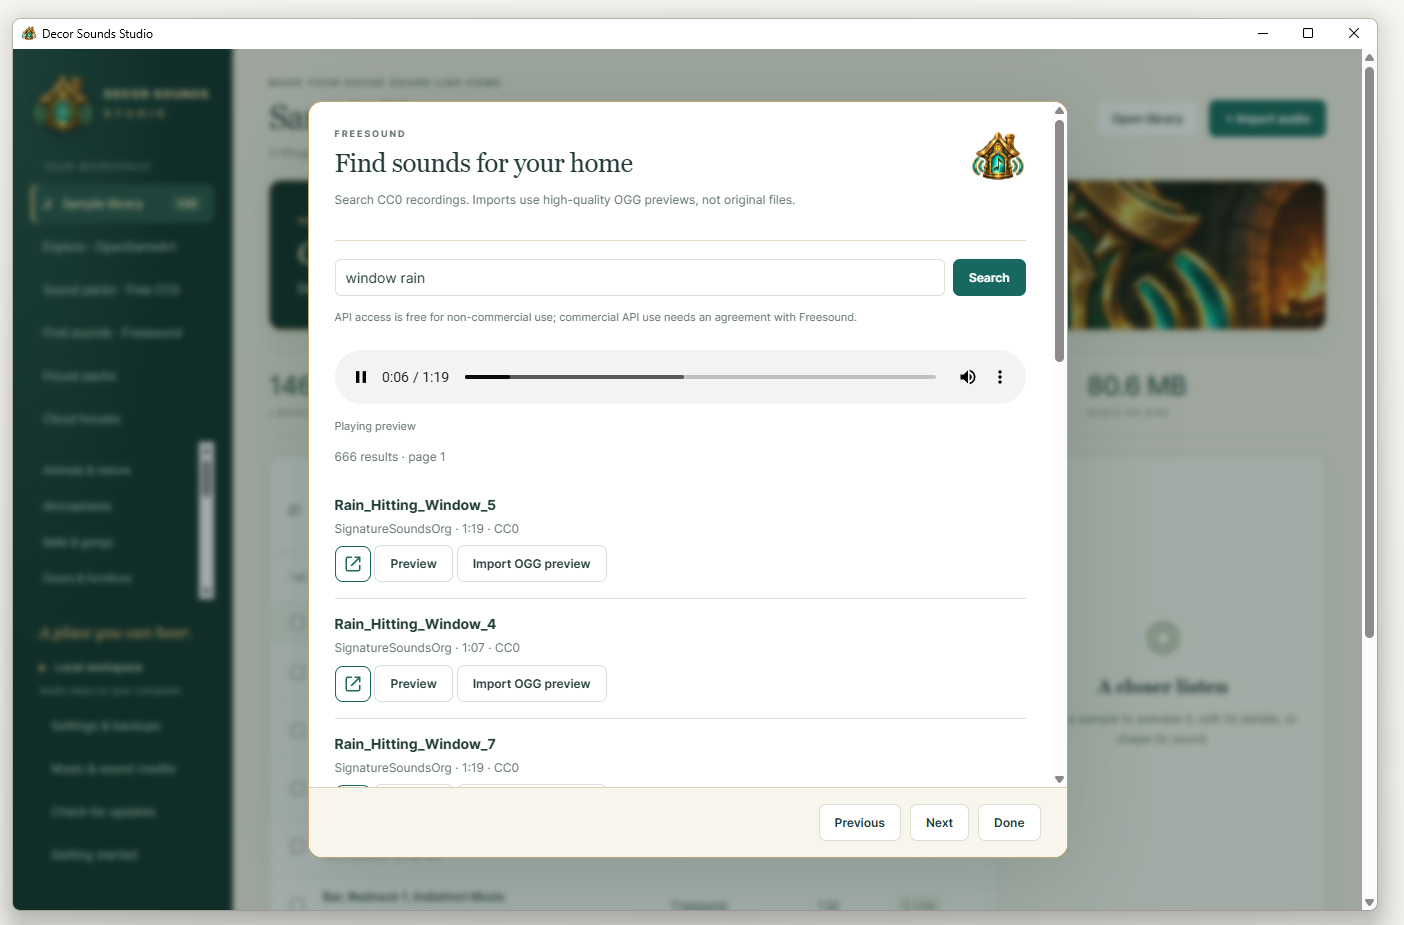
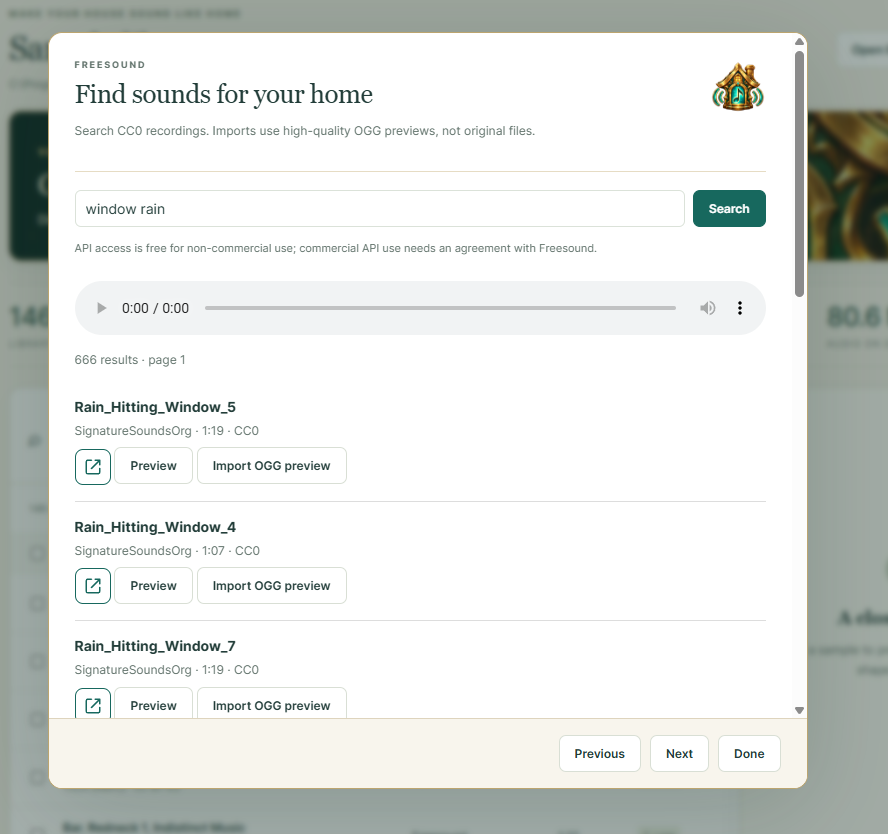
- Obtain your own API key through your Freesound account.
- In Studio, open Settings & backups → Freesound, enter the key and save.
- Open Find sounds · Freesound. Search for a sound such as rain, fireplace or dishes.
- Use Preview to listen. The external-link icon opens the source page.
- Choose Import OGG preview to add it to your local library.
This integration searches CC0 recordings and imports high-quality OGG previews, not the original uploads. It records the source and conversion information needed for cloud publishing.
Your Freesound key is separate from your Studio cloud token. Both are stored locally by Studio; do not include them in screenshots or send them with house packs. See the Freesound API terms for access conditions.
MORE SOUNDS FOR YOUR HOME
Explore OpenGameArt
The sounds included with the add-on are a starting point. Use Studio to discover more sound effects and music, and build a library to suit your house.
- Install Studio 0.7.3 or later and connect your installed Decor Sounds folder.
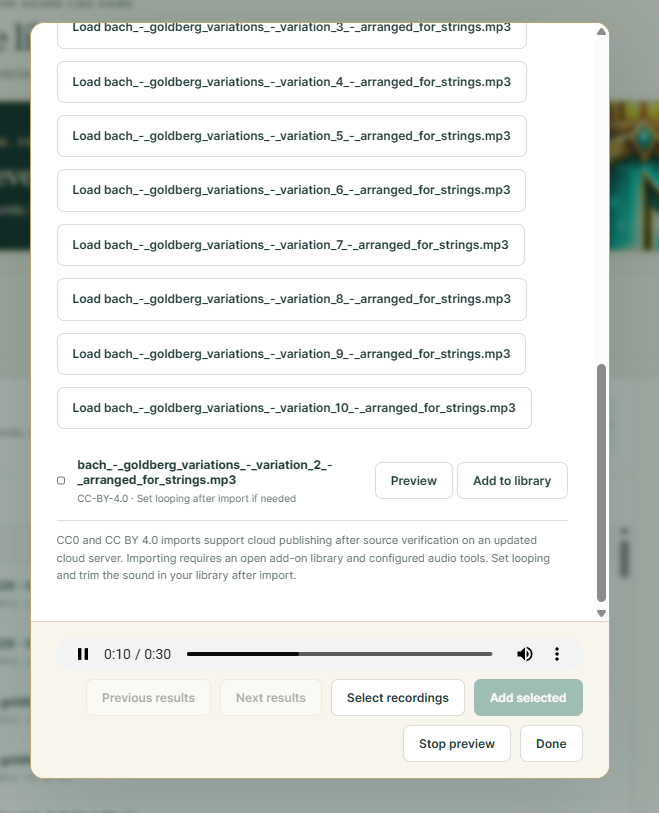
- Open Explore · OpenGameArt. Search for a sound, choose Music, or paste an OpenGameArt sound-page link into Open pack link.
- Choose Explore recordings, then select a listed audio file or ZIP pack. Studio checks that the page offers CC0 audio.
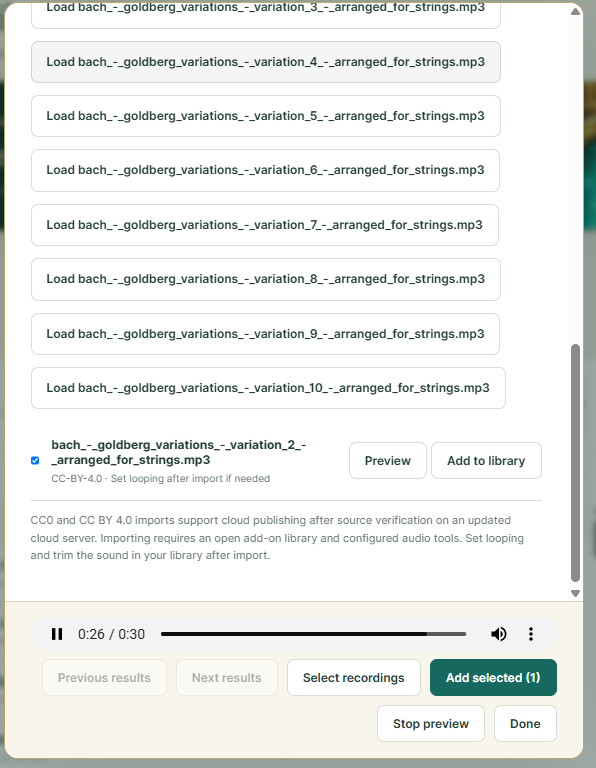
- Preview the recordings. Choose Add to library, or select several and choose Add selected.
- Adjust the name, trim and playback mode in your library. Choose loop for backgrounds or one-shot for individual effects.
- Restart WoW after adding new sounds, keep Decor Sounds and Decor Sounds – My Library enabled, and assign your sounds to rooms or zones.
Start with a collection
Open Sound packs for curated Home & Tavern, Water & Weather, and Workshop collections. Preview a sound and add it to your library.
Share your finished house
Supported CC0 OpenGameArt imports can be published through Cloud houses. For imports made before Studio 0.7.3, open Cloud houses → Publish a new house → Prepare OpenGameArt sounds, then check visitor readiness. Preparation preserves existing sound IDs and assignments and reports recordings that need attention.
Visitors use Studio 0.7.3 or later to install the settings and get missing sounds. OpenGameArt downloads need no API key; Freesound recordings still need the visitor’s own Freesound key. OpenGameArt previews play in Studio.
Why does the first preview take longer?
A pack must download before its recordings are ready. Studio shows progress, prepares supported audio formats, and reuses local previews when you play them again. Large packs and source-site delays can make the first download slower. You can choose another recording while a preview is loading.
If a source recording changes or is removed, Studio may be unable to download the matching version. Your already installed local recording remains available.
Back to contents ↑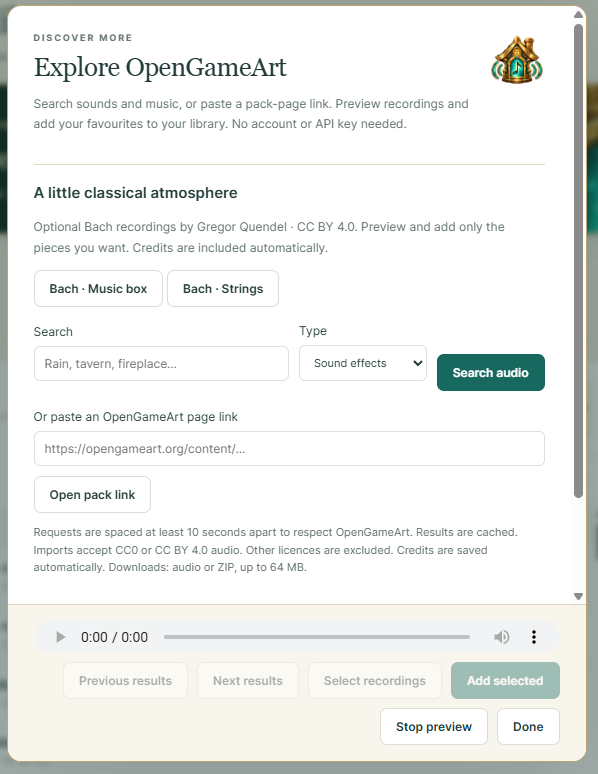
CHAPTER 09
Read your saved build from WoW
You usually do not need to copy export text. Studio can read the settings WoW has saved to disk.
- In WoW, save your zone and room changes. If you want the named snapshot, use Save as new build or Update selected.
- Visit every configured room so the add-on can record which house it belongs to.
- Run
/reloador log out to write the settings to disk. - In Studio, open the publishing form in Cloud houses or the creation form in House packs. Choose Import from WoW.
- Select the WoW account and click Read saved settings. Choose the setup and house.
- Review the room/zone counts and warnings, then choose Use this house.
Current setup includes saved zone edits even if you have not updated a named build. It does not include unfinished forms. A named build contains the snapshot last saved to that entry.
If the account is not detected, choose WTF/Account/YOUR_ACCOUNT/SavedVariables/DecorSounds.lua manually from the correct WoW client. Studio reads the file; this step does not publish or change the in-game setup.
Use copy and paste when needed
In WoW, open Builds → Share current house or run /dsounds share. Copy the export with Ctrl+A then Ctrl+C and paste it into Studio’s House export field.
CHAPTER 10
Create an account & connect Studio
- On this website, choose Sign in → Create an account. Complete email verification.
- Sign in, open Account and find Connect local Studio.
- Enter a device name, confirm your password and choose Generate token. Copy it when it appears.
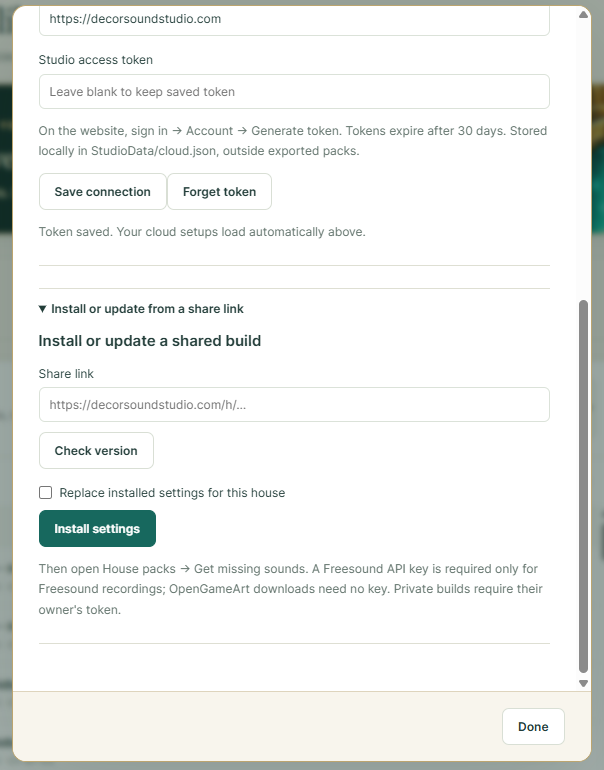
- In desktop Studio, open Cloud houses → Connect your account.
- Set the cloud site to this website’s HTTPS address, paste the token into Studio access token and click Save connection.
Tokens expire after 30 days. Generate a new one when needed, and revoke lost or unused devices on the website. The cloud token goes into desktop Studio, not into the WoW add-on or the Freesound API key field.
If registration is unavailable, the operator has not enabled it. If email does not arrive, check spam and use Need a link? on the account page. An “Email delivery failed” message needs the site operator to check its mail service.
Back to contents ↑CHAPTER 11
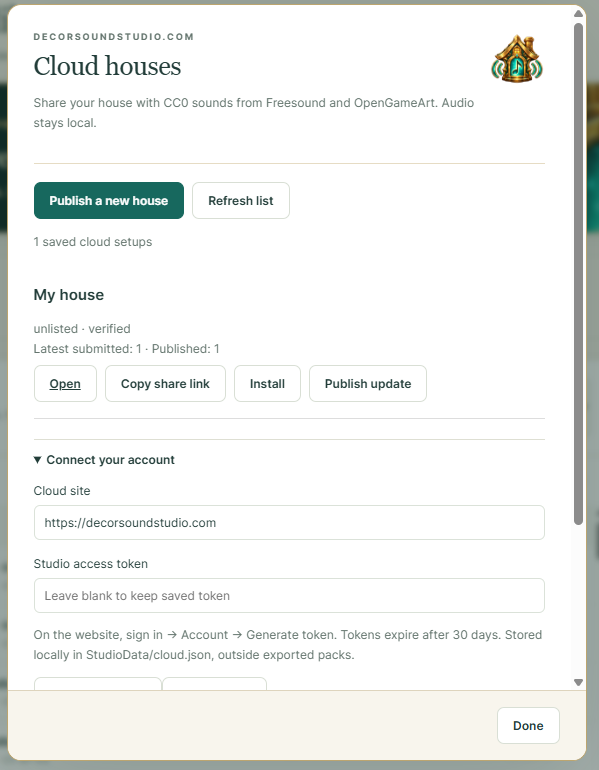
Publish & update a cloud house
- Connect the correct add-on library and your cloud account in Studio.
- Open Cloud houses → Publish a new house.
- Use Import from WoW, or paste a fresh Share current house export.
- Choose the visibility and add a description. Private is a useful starting point while reviewing your build.
- Click Check visitor readiness. For older OpenGameArt imports, use Prepare OpenGameArt sounds first. This keeps existing sound IDs and assignments.
- Click Submit for source verification.
- Use Refresh list to check the result. A queued version is not published until verification succeeds.
Cloud houses opens with your saved setups. Each entry shows visibility, verification status and latest submitted/published versions. Use Open, Copy share link, Install or Publish update.
Publish a new version of an existing house
Choose Publish update on its entry, import a fresh setup and review the selected build before submitting. This creates a version of that cloud build instead of another separate house.
If source verification fails
The cloud accepts supported CC0 imports from Freesound and OpenGameArt with the source details Studio saves on import. It does not accept embedded audio, arbitrary local files or every sound bundled with the add-on. A bundled sound named “fire”, for example, is not automatically an eligible cloud reference.
Read the reported error and check every assignment: house background, room backgrounds, room effects and all zones. Replace unsupported sounds using the Studio integration. Re-export or re-import the saved setup before trying again. The exported layout alone contains sound IDs, not enough source metadata to prove which recording is eligible.
CHAPTER 12
Manage visibility, versions & deletion
Sign in on the website and open My builds. You can manage your own cloud houses here; publish new audio assignments from desktop Studio.
| Visibility | Who can access it? |
|---|---|
| Private | Only the owner, with the owner’s account or Studio token. |
| Unlisted | Anyone who has the link. It does not appear in the public directory. |
| Public | Available in the community directory once published. |
Use the visibility selector to change access. Version history shows verification status and errors; Retry failed verification requeues a failed latest version after a temporary problem. It does not fix an unsupported source.
Replace share link invalidates the previous link. Delete build removes the cloud build and all its versions after confirmation. Neither action removes copies that visitors already installed.
Under Account, you can revoke Studio tokens, download your account data or delete your account. Account deletion also removes your cloud builds and tokens.
Back to contents ↑CHAPTER 13
Install a shared house as a visitor
- Install the add-on and connect its folder in desktop Studio.
- Open a house on the website. Copy its share link.
- In Studio, open Cloud houses → Install or update from a share link. Paste the link and choose Check version.
- Review the house. Enable Replace installed settings for this house only when you intend to replace an existing installed version, then choose Install settings.
- Use Studio 0.7.3 or later. Open House packs → Get missing CC0 sounds. OpenGameArt recordings need no API key. For Freesound recordings, configure your own Freesound API key under Settings.
- Let the local downloads and conversions finish. Try
/reloadin WoW; restart it if new sounds do not play. - Visit the matching house and test its rooms and zones.
The website’s settings ZIP contains settings and source references, not audio. Missing or mismatched recordings are not replaced with unrelated sounds. Private houses require the owner’s token, so use public or unlisted visibility for visitor sharing.
Back to contents ↑CHAPTER 14
Local house packs & sample packs
A house pack carries one house’s setup
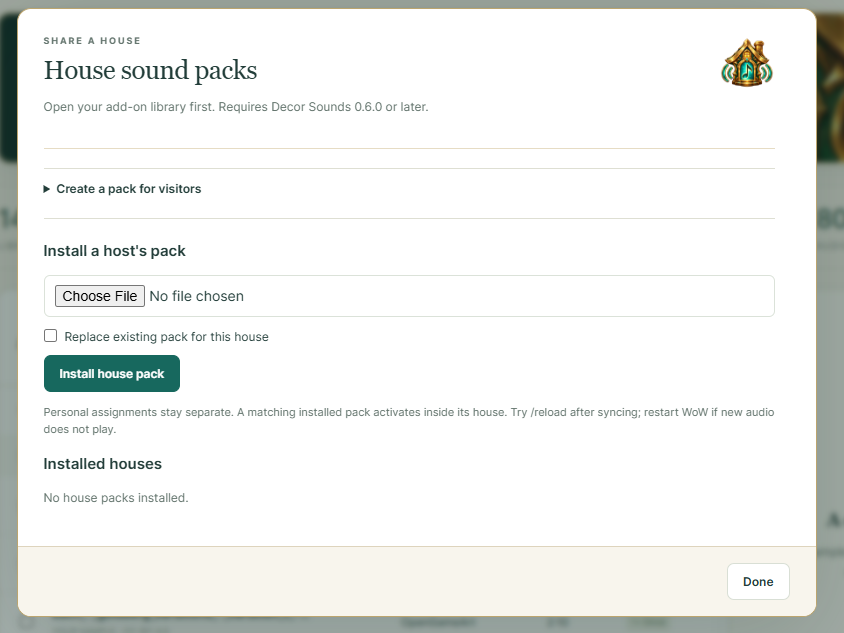
In House packs → Create a pack for visitors, import a saved house from WoW or paste an export. Review its assignments and create the pack. Local pack creation supports eligible audio packaging or source references, depending on the chosen options; keep the source and licence records with the pack.
To install a ZIP, use House packs → Install a host’s pack. Select the file, review the replace checkbox and choose Install house pack. Installed houses appear in that dialog.
A sample pack carries library sounds
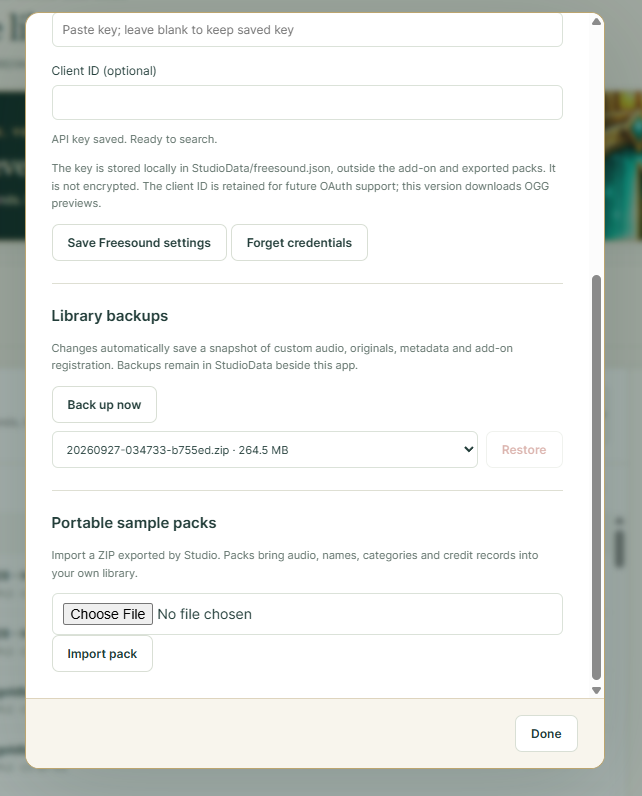
Use Export selected in the sample library to package selected recordings. Import a Studio sample ZIP through Settings & backups → Portable sample packs. This is separate from a house layout.
Licence labels in the local library are your records, not an independent verification. The cloud has stricter source requirements, so a working local pack is not automatically publishable there.
Back to contents ↑CHAPTER 15
Backgrounds & game audio
Choose the atmosphere for each space
Use a house background as your default atmosphere, and set room backgrounds wherever you want a different sound. Zone sounds can layer over the background or replace it within their radius.
Keep your preferred game audio settings
Set game music to your preference in WoW’s audio settings. You can keep music off while using Decor Sounds.
Create quiet areas
In Sound zones, use Mute house background or Mute room background + room loops to create a quiet area. Remove a zone’s sound while keeping its mute settings if you want that area to stay silent.
Quiet house
Quiet house (your own house only) mutes game ambience, effects, music and dialogue while keeping Master on. It restores the previous settings when you leave or turn it off. Use Restore audio / quiet off to restore those saved settings immediately.
Back to contents ↑CHAPTER 16
Update safely & keep backups
Get updates from Studio
Starting with Studio 0.7.5, the app checks for new versions when you open it, at most once a day. An available update appears above your library. Choose View update to see the release notes and download the Windows installer.
- For a manual check, choose Check for updates in the sidebar.
- Choose Download Windows installer. This opens the official download using your browser.
- Finish your work, back up your library and close Studio.
- Run the downloaded installer, then reopen Studio. Your library and settings are retained.
You can turn automatic checks off in the Studio updates window. Manual checks remain available. Checking needs no cloud account or connected library; if you are offline, keep using Studio and try again later.
Upgrading from 0.7.4 or older? Install Studio 0.7.5 from this website once to enable future update notices. Studio never installs updates automatically.
Before updating, close Studio and exit WoW so the game has written its settings. Keep a copy of your DecorSoundsLibrary folder and your account’s SavedVariables/DecorSounds.lua. If upgrading from an older layout, also preserve DecorSounds/Sounds/User. They hold different things: audio files and in-game setups.
Studio’s Settings & backups → Back up now captures the custom audio library and its records. Use the backup selector and Restore when you need to roll that library back. This is not a replacement for backing up WoW’s saved settings.
Follow the release’s installation notes. Do not delete your custom Sounds/User files when replacing add-on code. Use Repair add-on registration if an update overwrites its registrations. Keep named builds as milestones and use the recovery build created before a load when needed.
For desktop problems, the installed app’s log is normally under %LOCALAPPDATA%/DecorSoundsStudio/StudioData/logs/studio.log. Share the relevant error, not passwords, tokens or full credential files.
See it in action
Explore the add-on and Studio at your own pace. Select any screenshot for a closer look.
Inside the add-on
Inside Studio
CHAPTER 17
Troubleshooting & common questions
I saved in WoW. Why does Studio show an old build?
Save the zone form, update the named build if using it, then run /reload or log out. In Studio click Read saved settings again. Check the selected account, setup and house. WoW’s disk file does not update after every click.
Why are rooms missing from the export?
Visit every configured room in the house so the add-on records its house mapping. Reload and read the settings again. Older snapshots can rely on the current mapping; review their warnings and counts.
Every sound was from Freesound. Why can’t I publish?
Check whether each sound was imported through Studio’s Freesound integration with reproducible conversion settings. Manually imported files and bundled sounds may lack that metadata, even with a CC0 label. Replace those assignments, then import a fresh layout.
I cannot hear a sound in WoW.
Preview it in Studio, confirm the add-on folder, repair registration and reload. Restart WoW for new audio if needed. Check Master sound is enabled, the zone’s room and radius are correct, and mute/replace settings are not suppressing the background you expect.
A cloud version stays pending or fails.
Refresh the list and open My builds → Version history for the error. A temporary provider failure can be retried. Unsupported sources need replacement and a new submission. If processing never advances, contact the site operator.
Studio no longer lists my cloud houses.
Open Connect your account, confirm the cloud site and replace an expired or revoked token. Tokens last 30 days. Refresh the list after saving the connection.
The browser warns about the site’s certificate.
Check the address. Do not enter your password or token until the operator fixes the HTTPS certificate for that hostname.
Does everyone hear my house automatically?
No. Visitors need the add-on, installed house settings and local audio. Use the visitor installation steps, then test in the actual house.
I loaded a build and lost recent edits.
In the updated add-on, look for the recovery build created before the load or use Undo load / relink while available. Older versions may not have preserved the work. Back up and update before continuing.
Where do I put the token from the website?
Desktop Studio → Cloud houses → Connect your account → Studio access token. It is not an in-game setting and it is not your Freesound key.
Keep sound zones on the intended floor
Decor Sounds 0.7.10 keeps the existing horizontal radius and adds a vertical limit. The default is 2 yards above and 2 yards below the saved centre height.
- Open Sound zones and select a saved zone.
- Stand on the intended floor. Open Height needs setting, then click Set height here.
- To adjust the vertical reach, enter a value and click Save limit. Use 0 for unlimited height.
- If this setup belongs to a saved build, use Update selected to save the changes to that build.
Setting height preserves the horizontal centre and radius. New zones capture your height automatically when available. Existing zones receive the 2-yard default but keep their previous playback until you capture their height.
Use Studio 0.7.9 and the zone-height cloud update to preserve height settings when sharing. Visitors need addon 0.7.10 or later.
Find sounds already in WoW
Decor Sounds 0.7.10 includes a searchable catalogue of 255,290 named WoW audio references.
- Open Library → WoW sounds, or type
/dsounds wow. - Search for words such as tavern, rain or waterfall. Use a category to narrow the results.
- Select a result and click Preview (8s). Use Previous and Next to browse more results.
- Edit Library name to give the sound a name you recognize, then click Add to Library. Your name is saved for future sessions.
- Choose it with the normal sound picker in Rooms & backgrounds or Sound zones. You can also use it in a time-of-day schedule.
The catalogue stays separate from your regular Library; only the sounds you add join your collection. Preview, Stop and Add to Library remain visible at the bottom.
During a preview, Decor Sounds silences its house backgrounds, room sounds and zones. Playback returns when the preview ends, you click Stop or close the browser. Background loops restart when restored.
Readable labels and location hints are suggestions derived from filenames. Open Details for the original filename and FileDataID. Adding an existing sound with a new Library name renames it without changing its assignments.
Your game Music setting stays unchanged. Some references come from other or older WoW clients, so preview each sound before assigning it. The catalogue is a community list of named files, not a guarantee that every WoW sound is available.
Already know an ID? Use Advanced: add by ID for FileDataIDs or SoundKit IDs. Studio 0.7.9 and the WoW-sounds cloud update support sharing these references; visitors play the audio from their game installation.